Be searchable on Makaton.org! Bookwhen is your CRM system, and it is key to managing and supporting your business.
Free to use and a small monthly cost of £7+VAT per month to take payments, but it is highly beneficial to your ongoing management of courses:
- GDPR compliant, keeping your data in BookWhen keeps it safe from hacked PCs and lost notepads!
- Likewise, you can’t accidentally loose a spreadsheet or note book, BookWhen is backed up on a server and will hold onto the data in your account for you
- It helps head office track training trends and gives us direction to support growing Makaton with you locally and nationally
- Data from the system means access to email marketing and communications supporting lead generation and repeat business.
You'll find a copy of this guide in your Tutor Operations Manual - your day-to-day guide to being a Tutor.
Using BookWhen
First, you will need to set up an account with Bookwhen.
To do this, you will need to link it to your Makaton account.
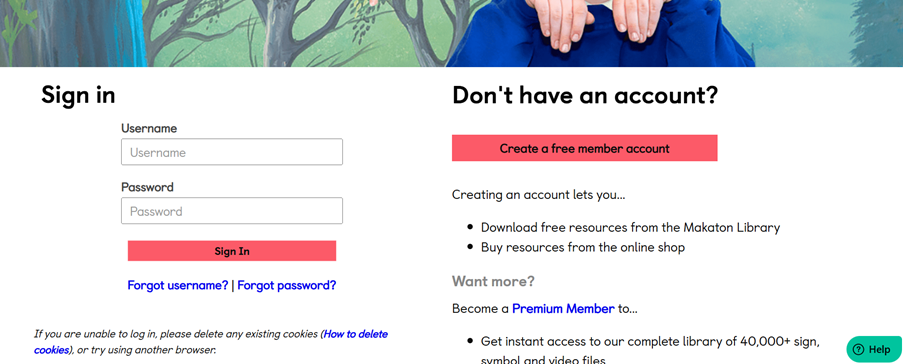
1. Go to https://www.bookwhen.com/login
2. Click on ‘Forgot Password’
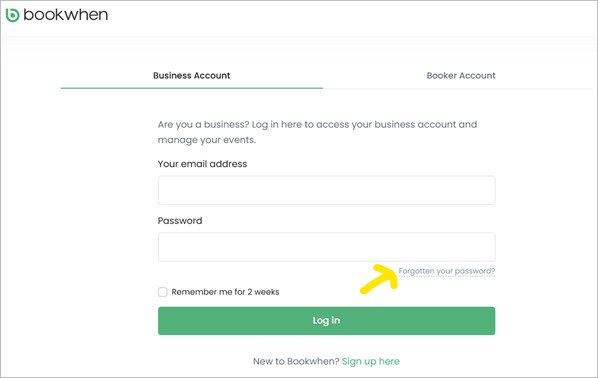
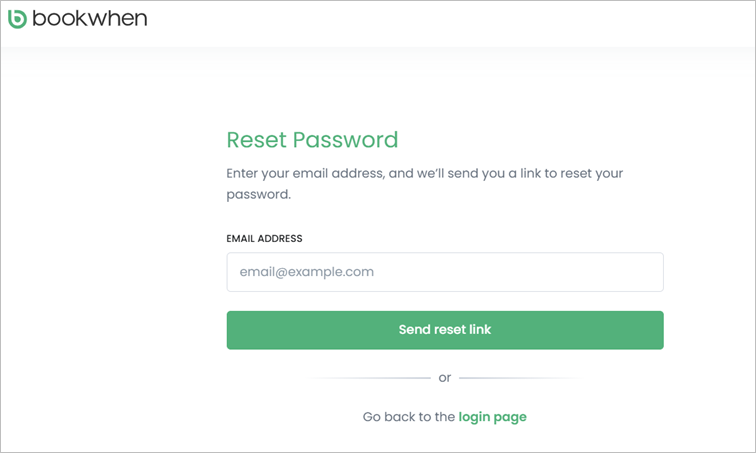
3. Enter your login email address used on Makaton.org and click on ‘Send reset code’
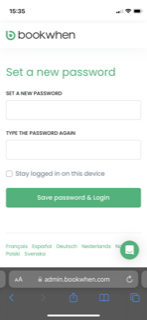
4. Set a new password and click on ‘Save password & login’
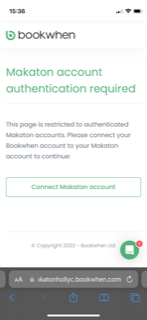
5. Click on ‘Connect Makaton account’ This will take you to the Makaton Hub.
6. Sign in to the Hub as usual using your Makaton.org login details.
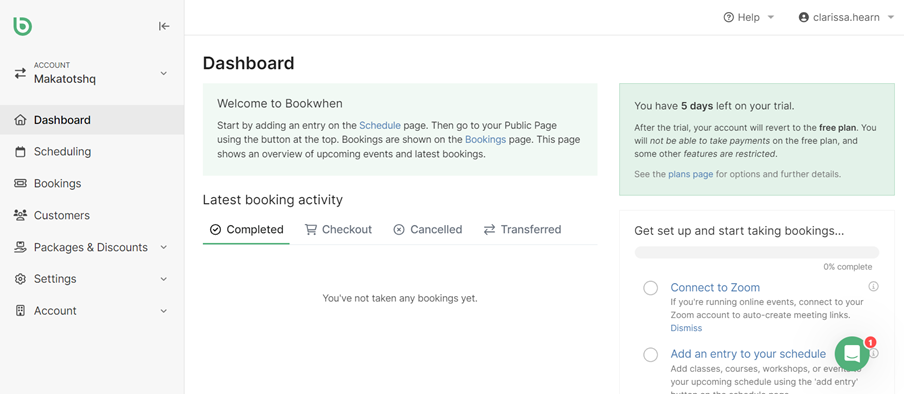
7. Bookwhen will then login, and you will be presented with a Dashboard. This usually shows your most recent classes.
Creating Workshops
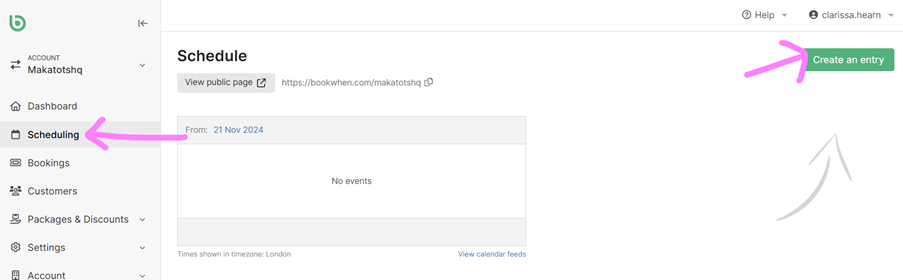
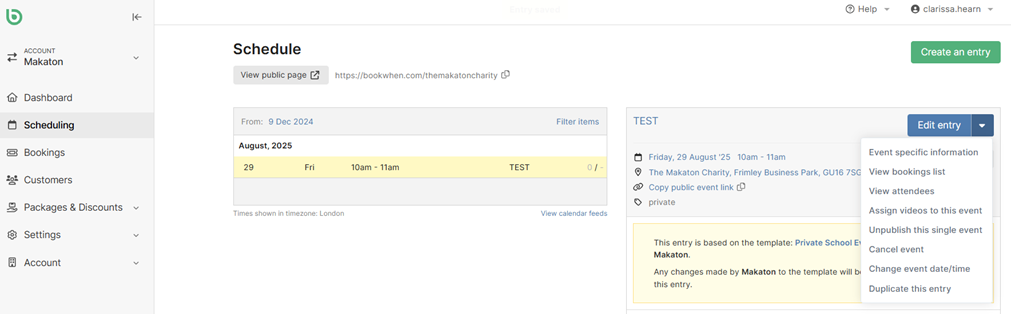
1. To create a class, click on scheduling on the left-hand side.
2. The window below will open. Click ‘Create an entry’ on the top right-hand side.
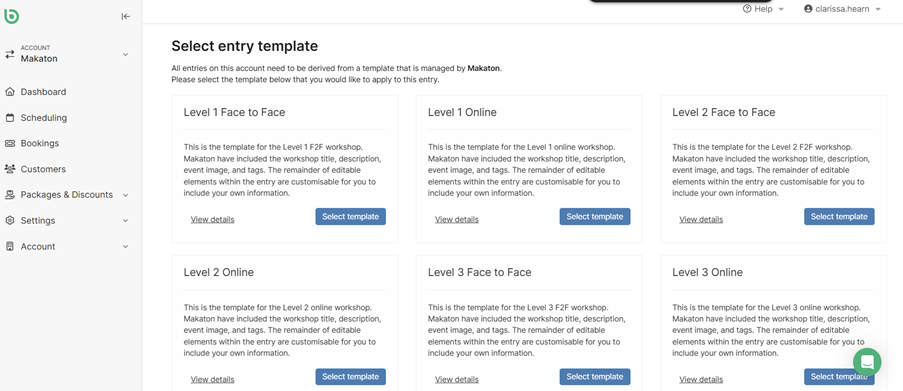
3. A number of templates will be there for you to use. Click on ‘Select Template’.
4. You will then be presented with a few tabs which you will be able to edit some of.
Fixed areas are greyed out and managed by Head Office.
5. Under the ‘Information’ tab (automatically the first area selected), when you scroll down you will see an area to add attendee instructions.
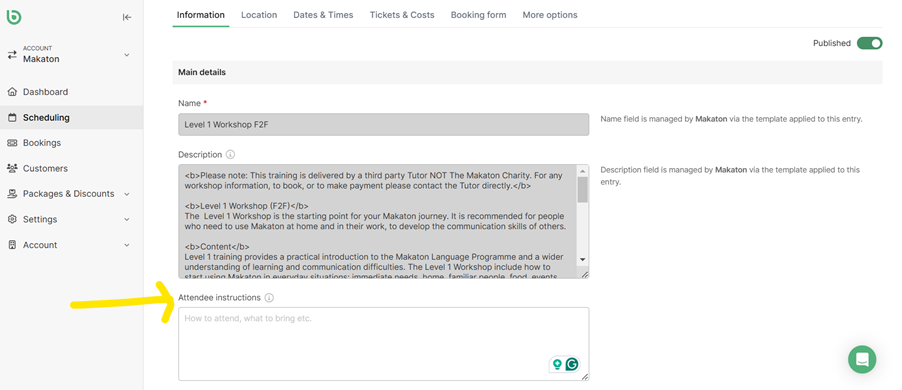
This is where you can add, for example:
- Please bring water as it’s very hot and there are no drinking taps on site
- Please do not bring food unless essential due to the risk of allergies. There will be a designated area to eat to avoid any mess or disruption to classes.
- Please park in the right-hand car park as it is allocated to the hall
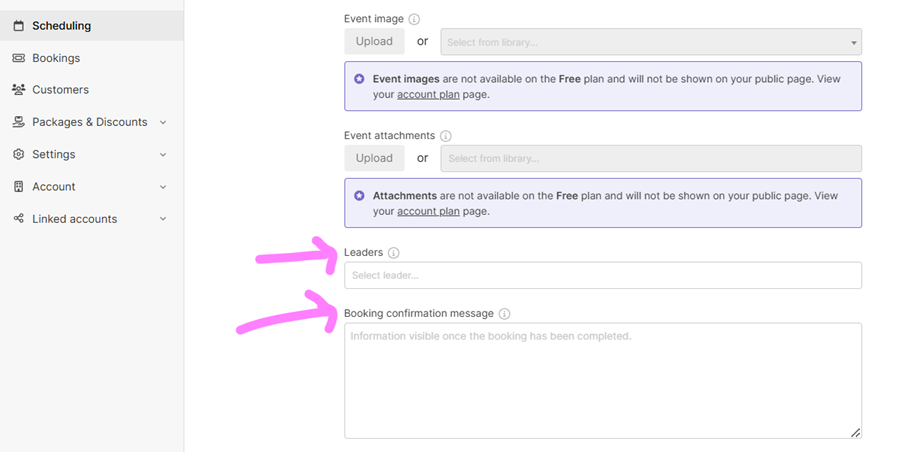
6. Next, you will see a couple of sections you cannot use. Under this is the header ‘Leaders’ where you pop your name.
7. The Booking confirmation message is the email that goes out when someone books a workshop with you. This should be:
‘Thank you for booking your Level 1 course! We look forward to seeing you’
8. At the very bottom, there is an additional details area.
For Private Events tag the entry as ‘Private’ to filter it out of the search on the website!
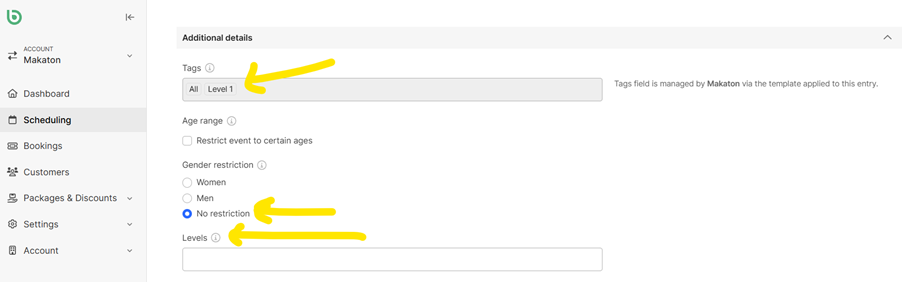
9. Choose if there are no gender restrictions and pop in any level requirements i.e. Level 1 required for a Level 2 course.
10. Scroll back to the top of the page.
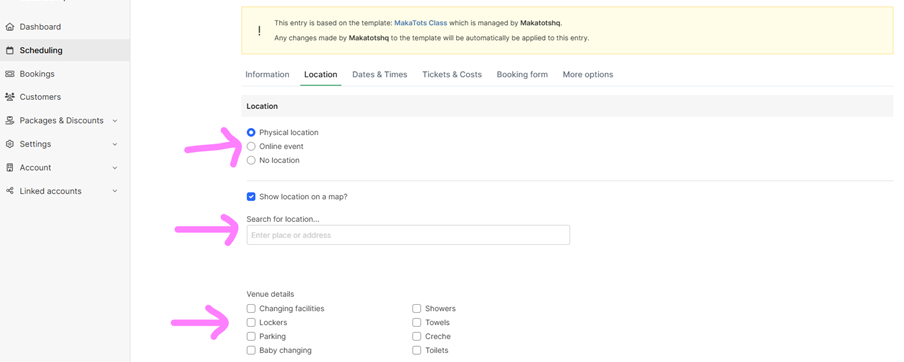
11. Click on the next tab ‘Location’.
12. Identify whether the course is in person or online and pop the venue address in/the Zoom link.
There are also checkboxes to identify venue facilities for in-person workshops.
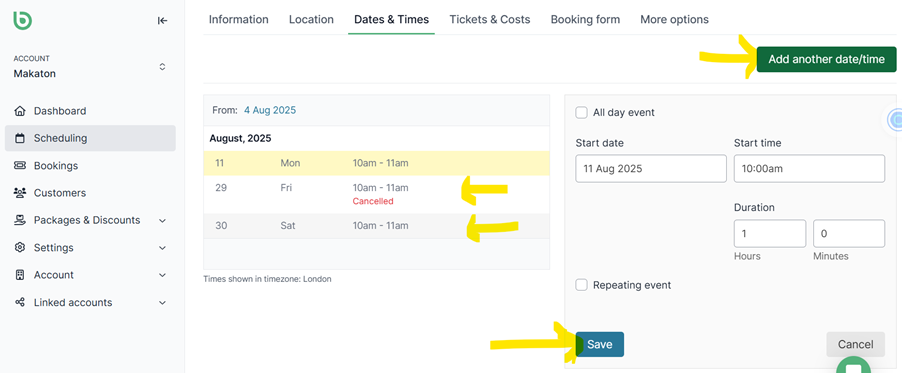
13. At the top of the screen click on the Dates & Times tab.
14. Add the date of your workshop. If split over two days, add both dates i.e. Level 1 on two evenings in a week.
15. Pop the date and time in and click save. Then click the ‘Add another date/time’ to add the second entry.
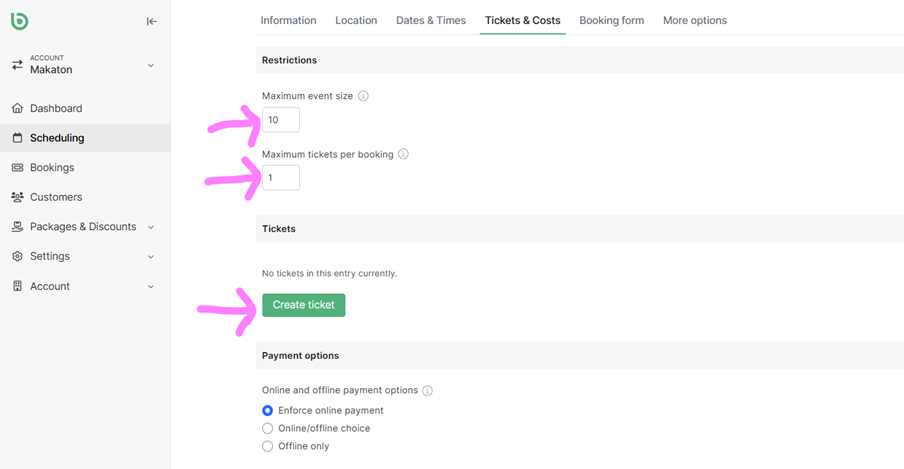
16. Then, at the top of the screen, click the ‘Tickets & Costs’ tab.
17. Under ‘Restrictions’ pop in the class maximum as per the Tutor Guidelines.
Each paying customer will buy a single ticket, so you can restrict ‘Maximum tickets per booking’ to one, unless it is a private event where an organiser will be booking on behalf of a group.
18. Click the green button ‘Create ticket’.
19. Add in the name of the course and pop a little description.
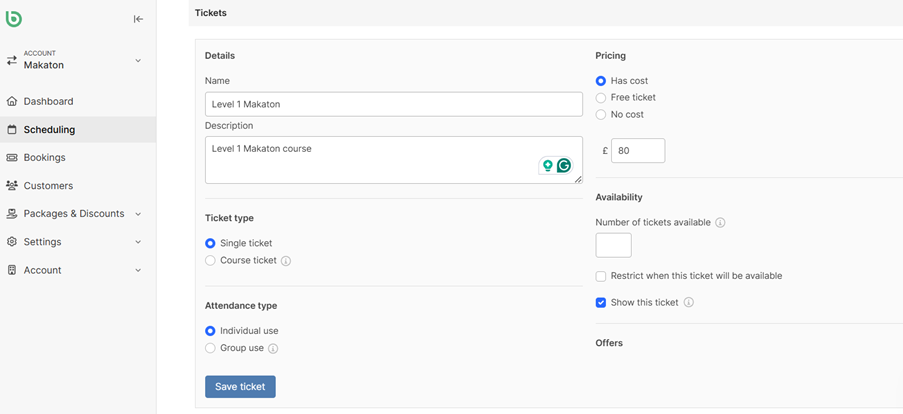
20. On the right-hand side pop in the course cost.
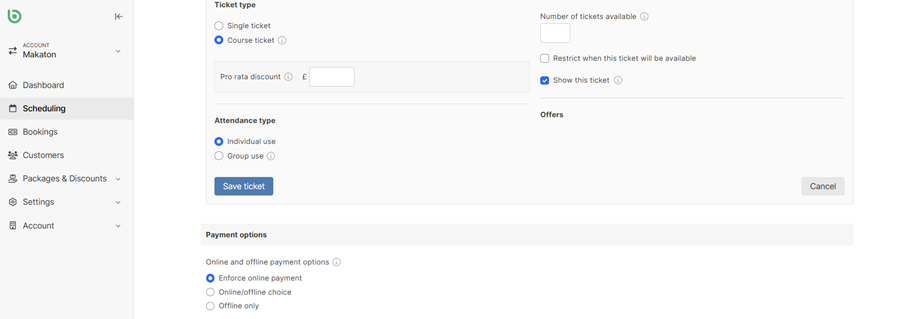
21. If your course is over a few days make sure the dates you entered reflect the whole course i.e. Monday 1st to Tues 2nd 4-6pm. This is good for where Level Training is split between two evenings.
Choose the ‘Course Ticket’ option to ensure the individual ticket option is only to complete the course paying for both dates/times displayed.
22. When you’re done making your ticket click ‘save Ticket’
23. Leave the payment option as ‘Enforce online payment’ if you are on a paid BookWhen account, which allows payments to be taken.
For free accounts, you’ll only have the offline option.
24. At the top of the entry, click on the tab called ‘Booking Form’.
This is the information that your customer will provide to book.
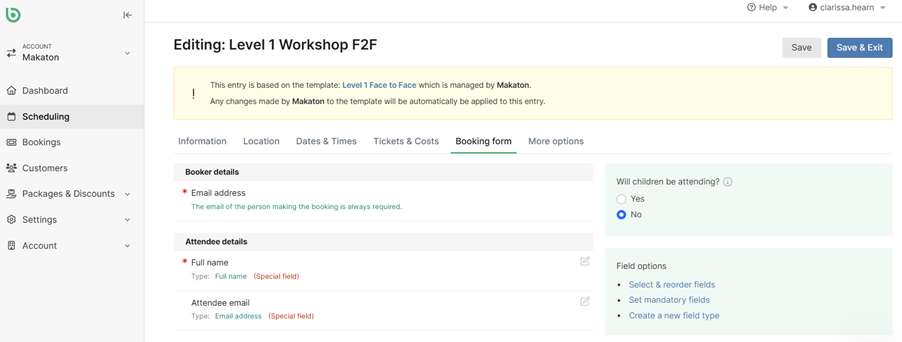
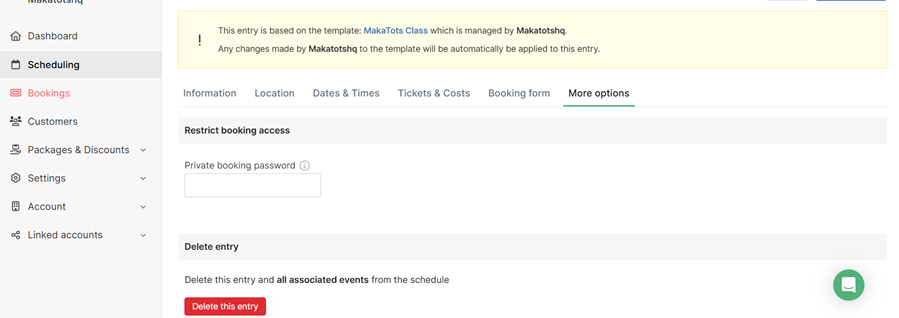
25. Under the final tab at the top of the entry called ‘More options’ you have a private code and deletion option.
26. Click on ‘Save & Exit’ when you are done to create the entry.
There will also be an immediate preview for you to edit the entry.
You can view it live using the top URL link in ‘View public page’.
Problems & Questions
Bookwhen has fantastic live chat support for you to ask questions and get help. You can also email Bookwhen directly at support@bookwhen.com.
The Tutor Support Team are also on hand to help where we can.